
Meeting documents - upload
In 2024 we launched a new simplified meeting document upload form. This functionality has been improved so that the users have one single form for uploading multiple and single documents.
The upload form
You enter the meeting document area as usual through the tab “Meeting documents” either on committee or group level. Also, here you find the folder that you need to upload documents to.
When you click the upload link, a simple form appears:
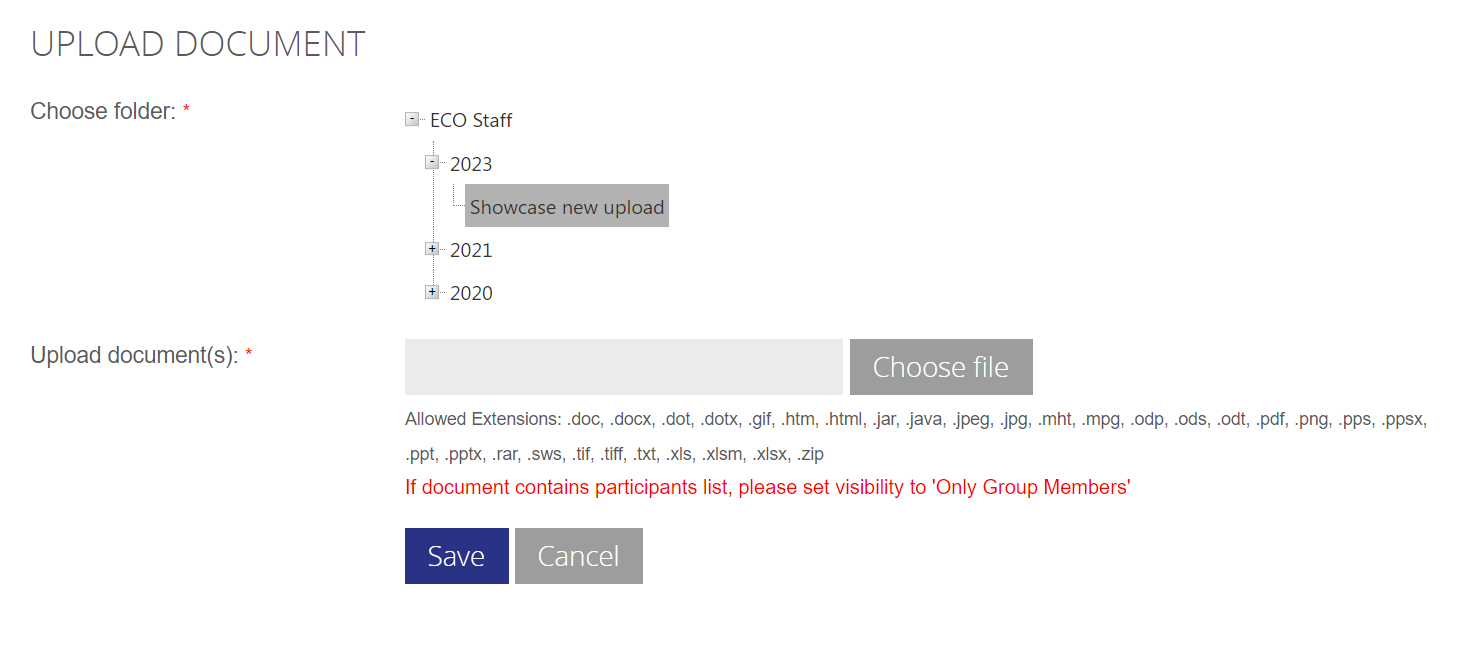
The form contains a folder hierarchy, and a single textbox for filenames.
This input box has the option to contain one or more filenames in one go:
Single document upload
For a single filename, click the “Choose file” button, and select the file you want to upload from the file list box appearing - this is pretty much as previous.
When the file is selected, an overview of the metadata is shown, edit to your needs and select save.

When done, click the Save button to upload your files.
Multi-document upload
For multiple file upload, the process is almost the same, click the “Choose file” button, but this time select multiple files from the filelist box (by holding down the Ctrl key, you can select individual files) :
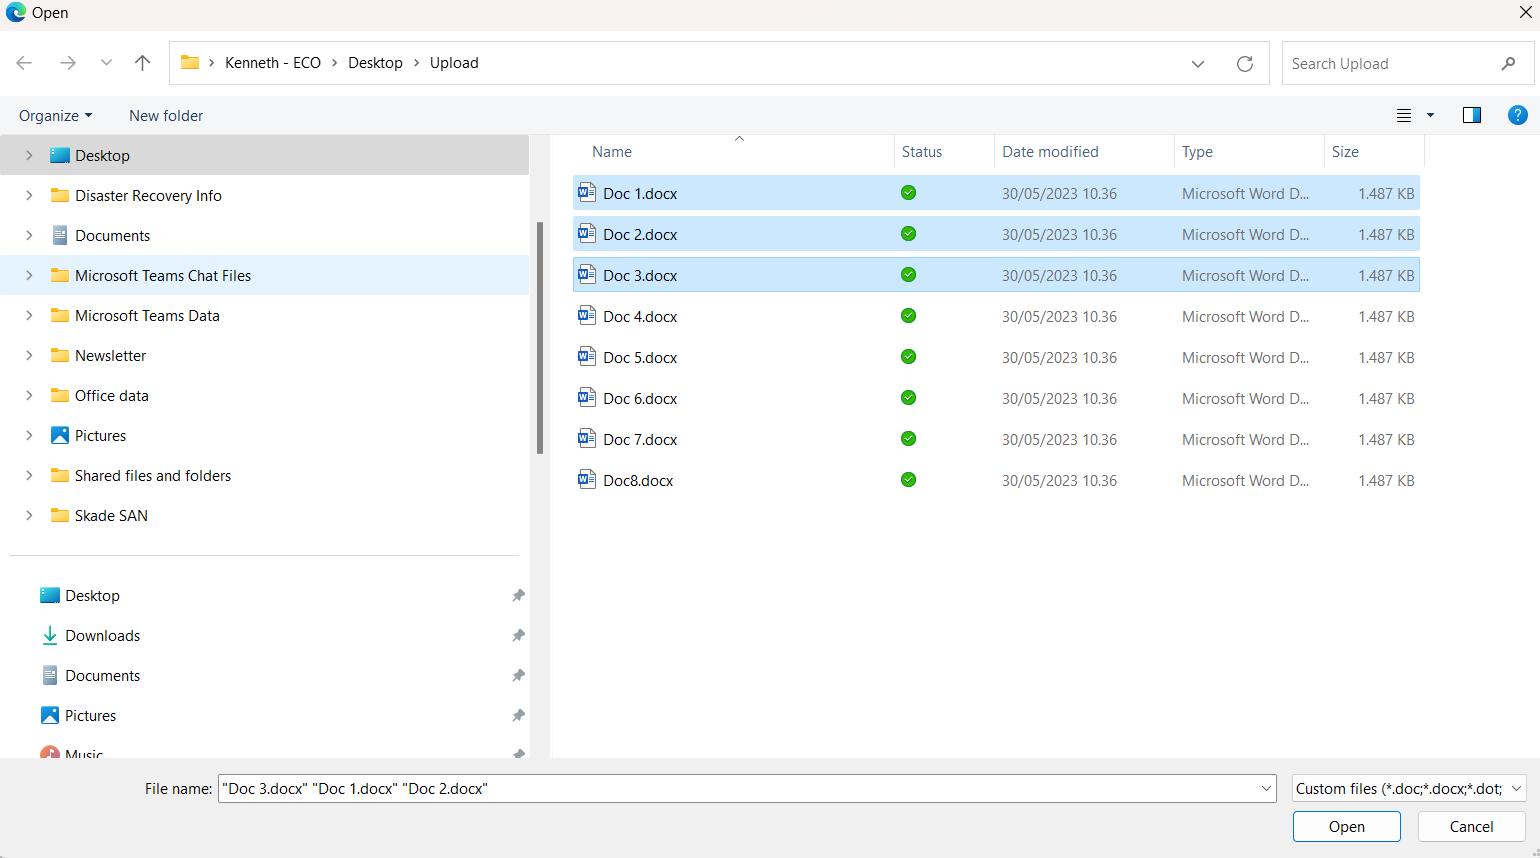
Click “Open” when done, and you will now see a list of the files and metadata you selected for upload:
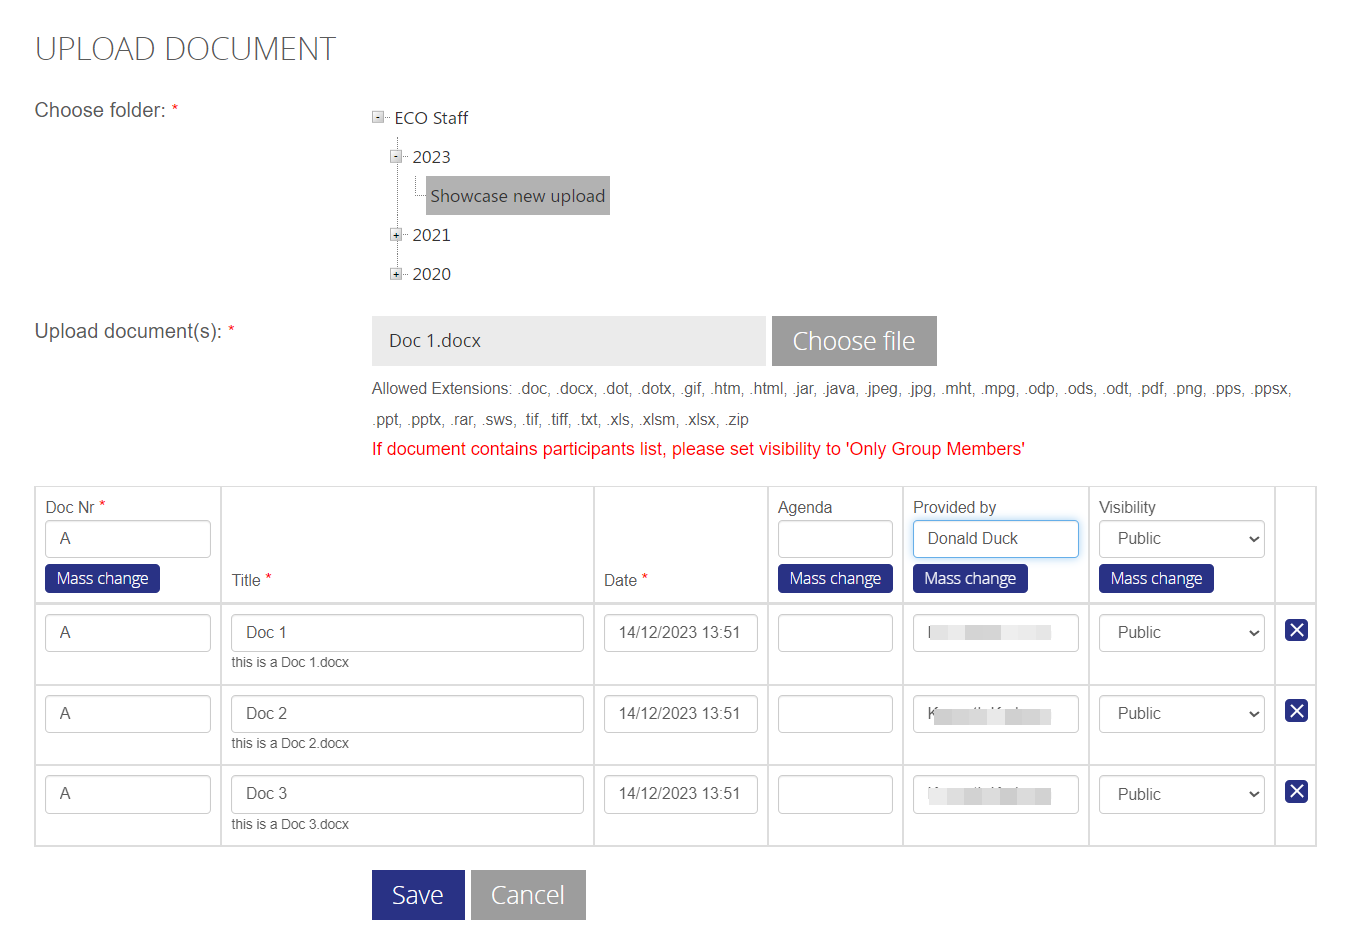
Edit the meta data to your needs, please notice that if you need to change to a similar value in the fields Doc.Nr, Agenda, Provided by or visibility, you can do so by entering the value in the designated textbox and click “Mass change”.
When done, click the Save button to upload your files.
Upload revision of document
To upload a revision of a document, the process is the same as a single file upload. The difference is that you can only select one file in the filelist box, and the metadata listed is from the main document uploaded - you can change these metadata if wanted.